WOOD-e
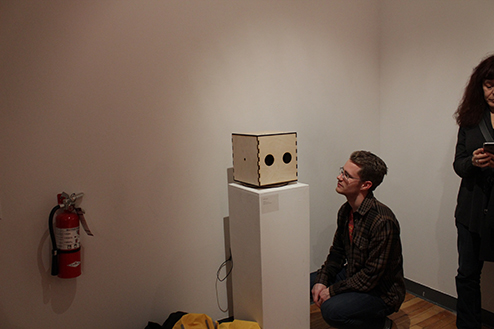
Meet wood-e.
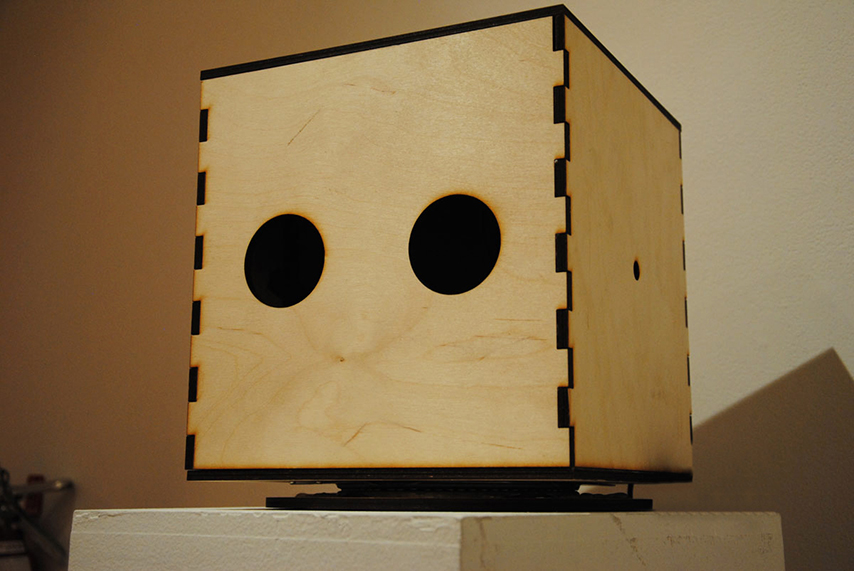
Being of the inquisitive kind, wood-e enjoys listening for the loudest shout, whistle, bump or crash in the vicinity. As he would no doubt himself attest to – if he could – he’s not exactly one of the hard of hearing. Sporting two quite sensitive electric microphones, this curious cube tries his best at picking out the most dominant sound source with his attentive, blinking gaze.
Conception of WOOD-e
Coming from a group research project on The Senster the next step was to think of ideas for our class’s follow-up Tamagatchi project.
I went through an extensive period of brainstorming where I looked at numerous things. One of the initial thoughts I had was to explore different physical human interactions based on their basic senses and try to figure out which ones were more intuitive than others.
When doing our prototype based on the Senster, named spot, I noticed that our classmates intuitively went for hand gestures and shouts when trying to catch spot’s attention. Delving deeper into those and other interactions I tried to visualize a sense of measure and scale for each interaction – sketching out forms appropriate (or not) to those interactions.
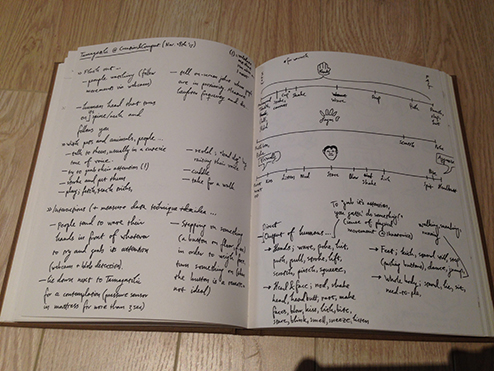
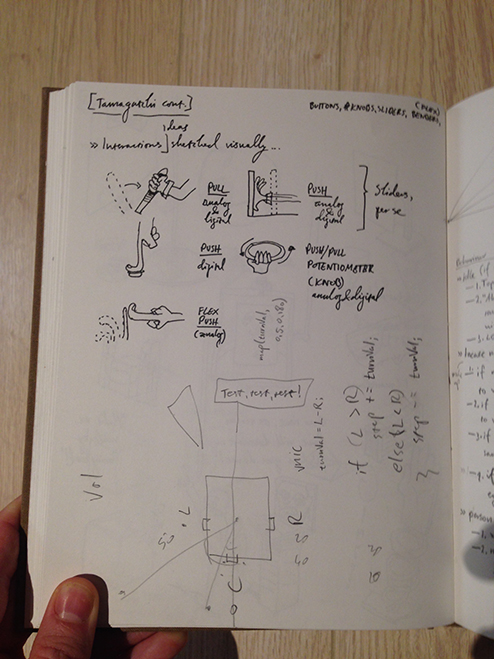
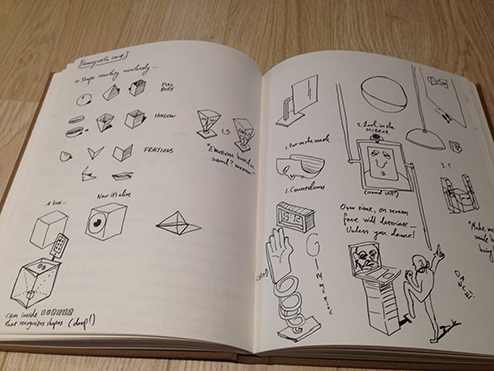
From the beginning I knew I wanted to move away from a face tracking robot like our spot and try to explore more ways of interacting with humans. In retrospect, though, as I’m writing this, I realize I might have been influenced by the Senster more than I initially thought.
The course that I eventually decided to take was to make a robotic head; a cube with two elliptical cuts in front and a strong light source emitting out light beams from within. Via sound localization, with electric microphones on either side, the head would turn on its neck in an effort to try and locate where the most dominant sound source is at each given time – effectively shining light on the matter.
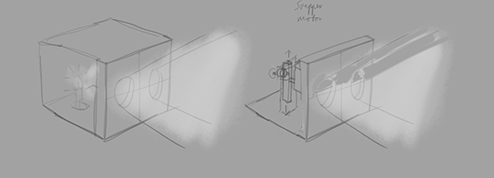
To add to the head’s believability of being alive, whenever the measured sound would reach to a certain level below a set threshold for a set amount of time, a pair of eyelids would slowly shut out the light beams from within the head. It would seem as though the head would fall asleep.
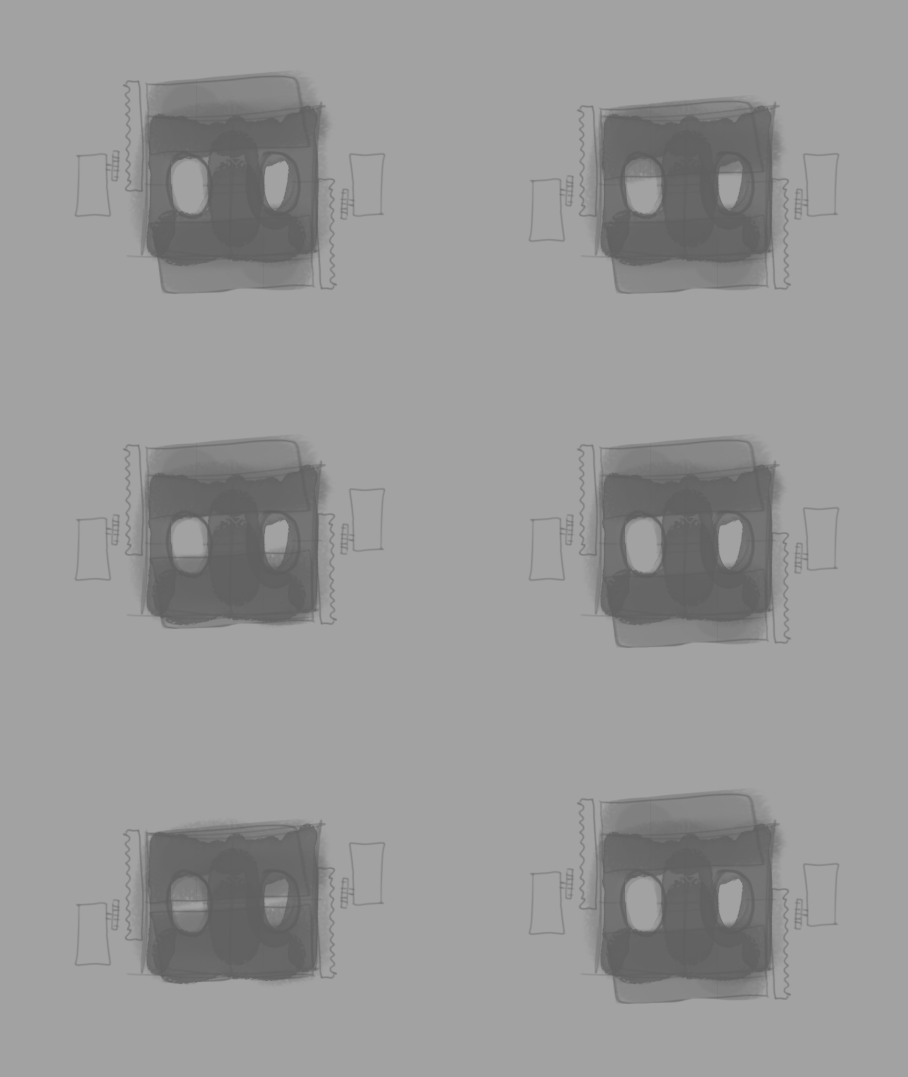
Furthermore, in an attempt to add more emotion to the head, I drew inspiration from My Iron Giant. The film’s character’s designers quite cleverly imbued the iron robot with different emotional states with different locations of its eyelids.

Sharp-eyed readers may have noticed the absence of lightbeams and sleeping behaviour in wood-e’s video above. Don’t worry, the reasons for their absence will be explained later on.
Prototyping WOOD-e: Version 1 and 1.5
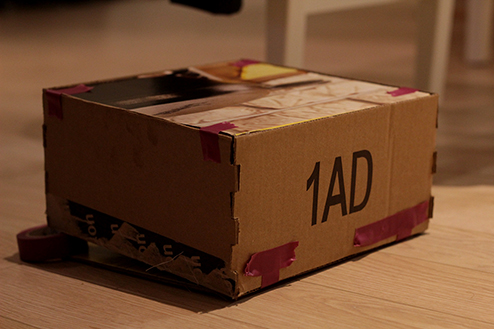
To keep the ball rolling I rummaged for a cardboard box in a similar size to what I had imagined. After cutting two wholes on the front of the box representing eye holes I then mounted the box on a standing lamp at home. On the inside of the head I taped cardboard eyelids in different states to see what kind of emotion it could portray.
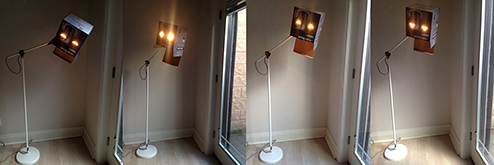
From that session I started to think more about the presentation of the head; should it stand on the ground, and if so, how high should its eyeline be comparing to an average height human? Maybe it would be more interesting to have the head hang from the ceiling?
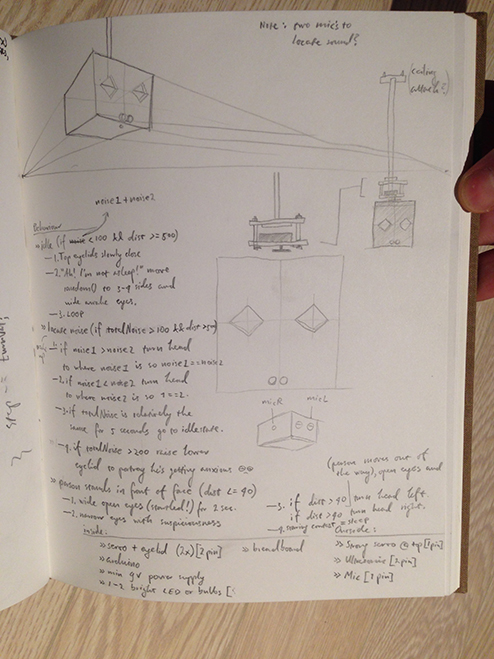
Meanwhile, I also did sound tests with two microphones and LEDs and then another where my bicycle light was hooked up on the main servo located in-between the microphones. Wherever there was more noise, based on extreme servo positions of 5° and 175°, the servo would turn to that position.
I wanted to see what the same function would look like with the initial cardboard head. I also wanted to get a feel of how the circuitry and eyelid mechanisms could be fitted within the head.
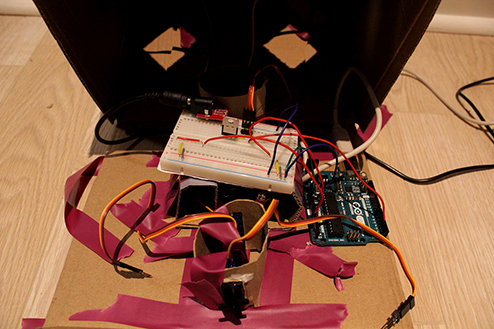
Some issues that were raised through these really helpful hands-on tests were f. ex. exploring weight distribution, looking into a more accurate way of localizing sound, imagining better structure materials and assembly options – not to mention thinking through light and power sources.

Fabrication of WOOD-e
Having decided on 6mm thick baltic birch plywood as my material for the head from the work done on prototype 1.5 I prepared a file for laser cutting at the OCAD Rapid Prototyping Lab. The following day I picked up the ready materials.
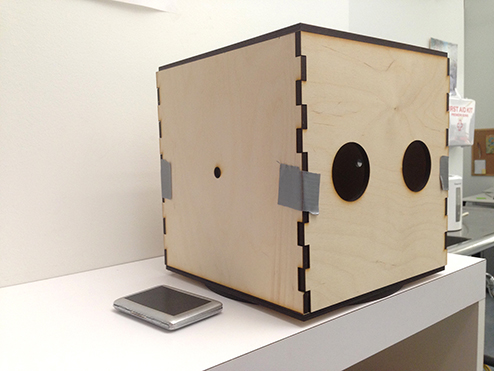
In a nice feedback session with Demi he mentioned some pragmatic issues with difficulties in OCAD’s space of having things hanging from ceilings. Furthermore, he highlighted the important factor of not giving the head-turning servo the role of the head’s weight bearer. The servo should only turn the head. Following that discussion I decided to have the head stand instead of hanging from the ceiling and to look into my weight issues.
Instead of having tiny supports made of wood around the underside of the base the ever helpful Reza at OCAD’s Maker Lab introduced me to a turntable plate bearing called Lazy Susan. The component is made up of two flat metal rings with numerous ball bearings in an elliptical ridge between them. A turning plate like this would hold the weight of the head while the head-turning servo would solely turn it.
With Reza’s help – and later from the faculty at room 170 at main OCAD building – I assembled together my laser cut plywood pieces with my chosen electric components.
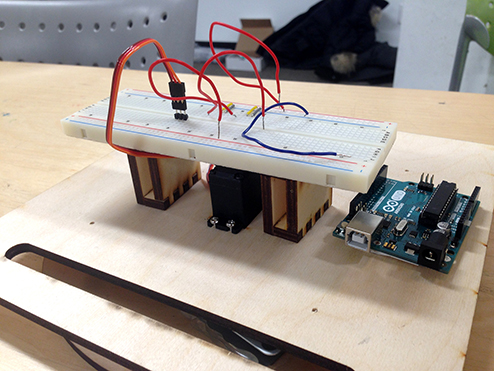
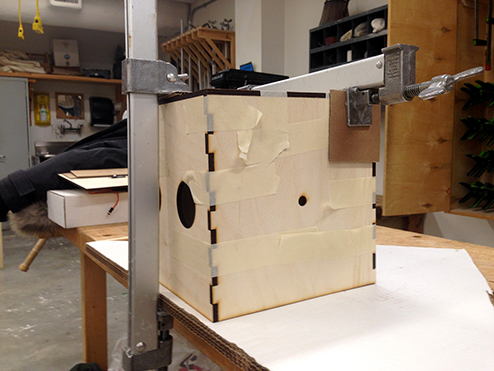
WOOD-e Tests
On December 5th I got wood-e to track a dominant sound source. The power source for the head turning servo was an external 9V 1A adapter with the power being stepped down with a 5V regulator before being hooked up to the head turning servo. The Arduino and the head’s microphones were running off of my Mac’s USB port.
Next I wanted to fit the top and bottom eyelids. Starting with the top one, I needed to calibrate the rotation angles of when the eyes were open and half-closed. I also wanted to try and have the servo movements at varying speeds so when the head gets sleepy the movements are slower.
With that pretty much settled, next up was doing the same thing with the bottom eyelid. This proved to be more troublesome for several reasons. The bottom eyelid servo’s prolonged arm did this sort of woodpecker drumming and if it would persist the arm would fall of the servo. Same thing would sometimes happen with the top eyelid’s servo. Aesthetically, because the bottom eyelid’s servo was the same side as the top eyelid’s one, the bottom eyelid’s servo arm was visible through one of wood-e’s eye holes.
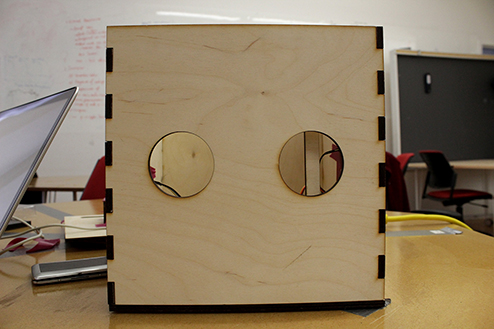
In an attempt to solve my woodpecker servo issues, the following day I purchased a 5V 1A 5200mAh battery pack that I was hoping to be able to hook up to the Arduino USB port and power the hole thing that way. Despite the fact that I seemed to have been successful at creating a pre-scripted timer controlling the speed of the eyelids after a certain period of time I kept running into power issues when trying to have the head-turning servo and eyelid servos working at the same time.
Following a final feedback session with Demi and Nick, I got for wood-e’s servos a 5V 5A adapter and for its sensors a 9V 1A adapter that would be regulated through the Arduino.
Nick also mentioned that since my eyelids were made from cardboard and were therefore relatively light, it could be wise to use the Arduino Servo library’s attach() and detach() functions to avoid the woodpecker drumming issues. Perhaps being offset by tiny currents in the circuitry the likely reason for the servos glitchy behaviour was that they were continually trying to reach a set position but missing their marks by a small measure and then trying to correct themselves.
Nearing the Finish Line
With our exhibition just around the corner, speed of final steps was vital.
Replicating the top eyelid’s servo fabrication for the bottom eyelid, I moved it to the floor side on the inside of wood-e to avoid the arm being seen through they eyes.
Just after having the eyelids working together, the main head-turning servo started to be non-responsive. After a ton of troubleshooting and debugging attempts, I re-did the circuitry from the ground up which, thankfully, had everything running again. How come, I’m ’till this day unsure of.
Remembering I wanted to wood-e to have a pair of light beams coming out from his eyes, I bought a pair of super bright LEDs that then proved to be too weak to illuminate from the inside out. I thought to myself I could buy more LEDs and connect them together to maybe have a strong enough of a light source but unless wood-e would be set in a dim room, the emitting would likely not be sufficient and then the time and effort I made to make wood-e look nice and impressionable would go to waste since he would be hard to see. I then made the hard decision to cut out the light beam feature.
The final and one of the most time-consuming issues I had had to do with timers inside of Arduino code. Thinking I had managed to build timers earlier on for when wood-e should start to feel sleepy if the sound levels were low enough for set amount of time and then anxious if the sound was above the set average, I started to realize those timers were not really dynamic at all. They were too pre-determined and scripted since they weren’t resetting when an opposite condition proved true.
For almost three whole days I worked on trying to figure out timers; how to set them, how to reset them, how to use them to let the eyelid servos finish their movement before they were detached. I somehow kept running into logical errors where my resets would never come true since I was, I assume, detracting the current time from itself but never actually making a reset. I apologize if this writing seems confusing, the reason is I still haven’t figured out where I went wrong.
With the exhibition starting the following day, I decided I didn’t want to let all the hard work of making the eyelids go entirely to waste. To still imbue wood-e with a sense of life and purpose, I wrote wood-e a blinking function with random open-eyes-intervals and a quick 250ms closed-eyes-interval.
In order for wood-e to stay relatively in tune with interchangable sound thresholds, Demi and Marcelo Luft suggested writing an auto calibration function for when wood-e is restarted. This seemed like a clever thing to do so I wrote it in a way so when wood-e was turned on, for the first 3 seconds he would shut his eyes, add up a sum of measured sound on his left and right and finally find the average within that timeframe. That way if he had been switched on for a while within a relatively empty room, if all of a sudden the room got filled with people I could pull his plug for a quick second and plug him back in, making him listen for his new surroundings.
Fine-tuning the calibration and testing the blinking with the sound localization in the space the day before and on the day of the exhibition proved to be really helpful in getting the feeling that I wanted.
Exhibition Day
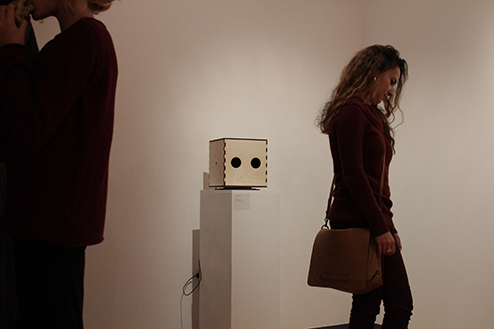
At the exhibition wood-e had people trying to grab his attention by either trying to wave at him, poke him in they eyes, touch him or, the fewest of times, speak to him.
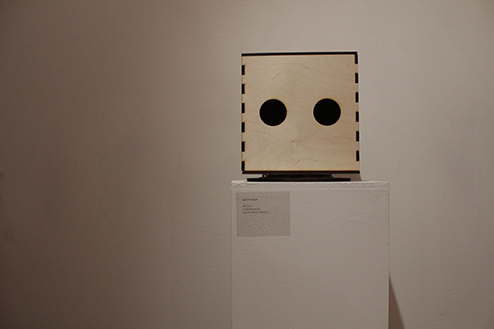
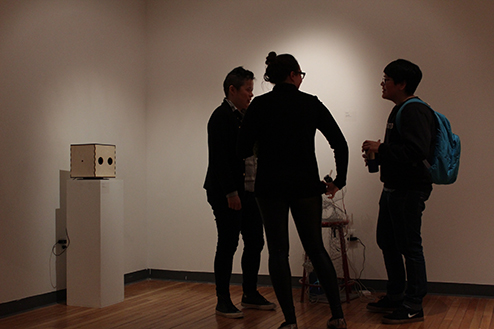
Twitching left and right trying to pick out the loudest noise at each giving time, perhaps it was because wood-e himself didn’t effectively enough give the impression of what guests should or shouldn’t do with him. Maybe it was because he was clean and proper in a clean and proper gallery space where Fusun’s enticing wire-netted legs contrasted beautifully with the space, drawing people in with ease.
Tending to be my own worst critic most of the time, and despite things didn’t go quite as planned, I really am content though with how wood-e turned out and how he came to be.
The public can prove to be one of the most difficult demographics to do projects for and one can rarely plan the appropriate steps all the way through. Assumptions – conception-, function-, fabrication- and coding-wise – are pitfalls that a strong sense of perseverance and test-attitude is needed to avoid throughout the process.
